
How to Add & Manage User Roles
Managing user roles and permissions in WordPress with Elementor ensures that each user has appropriate access rights, improving security and workflow organization. This guide explains how to manage roles effectively for both WordPress and Elementor.
A. Adding and Assigning Roles Roles in WordPress
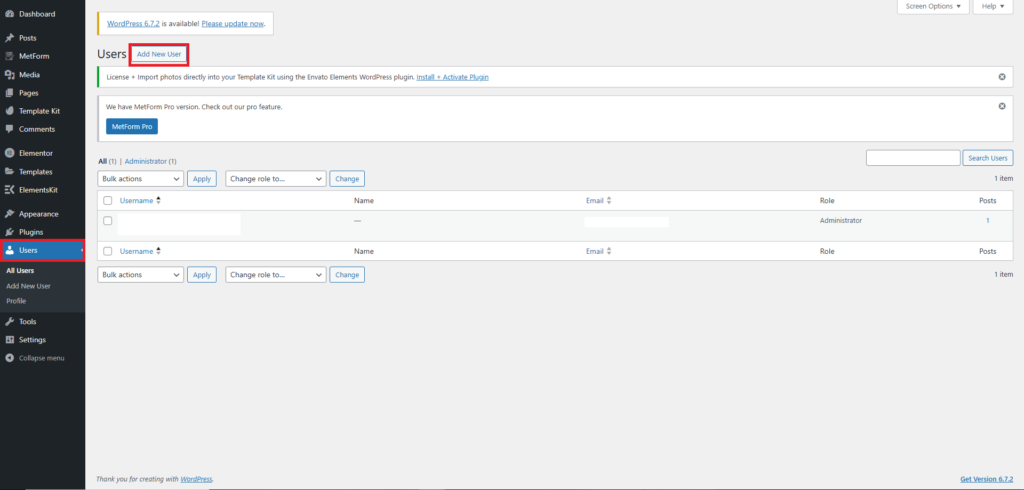
1. Go to the WordPress dashboard.
2. Navigate to Users > Add New.
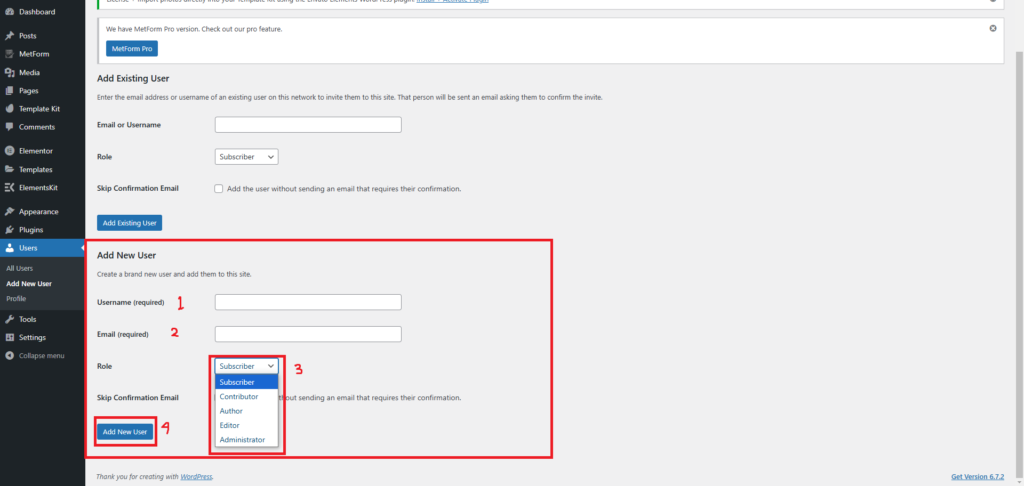
3. Enter the user’s information (username, email, and password).
4. Select the desired role from the Role dropdown menu.
5. Click Add New User to create the user with the assigned role.
B. Managing Permissions in Elementor
Elementor (especially Elementor Pro) allows you to restrict access to its editor based on user roles.
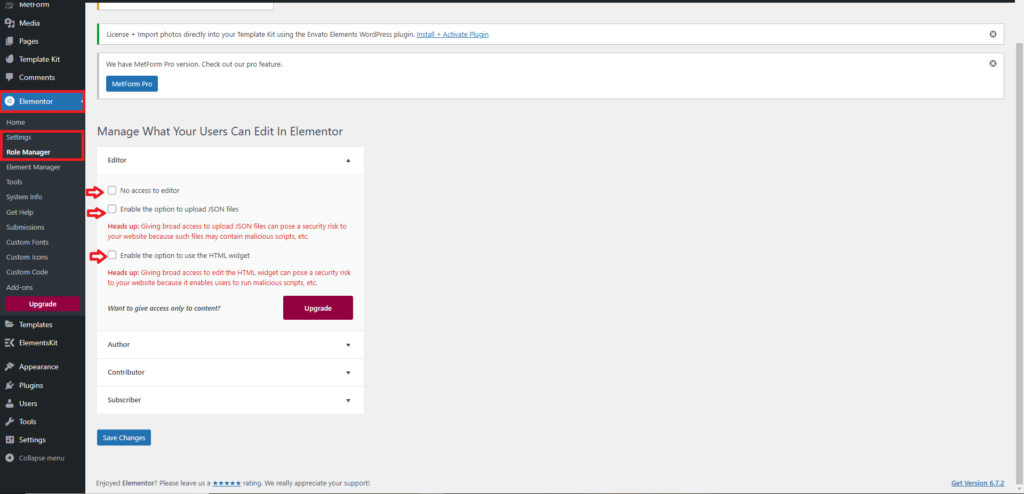
1. Go to Elementor > Settings in your WordPress dashboard.
2. Click on the Role Manager tab.
3. Set access levels for each user role:
- No Access: The role cannot use Elementor.
- Edit Own Content: The user can only edit the pages they created.
- Edit All Content: The user can edit all pages created in Elementor.
C. Best Practices for Managing Roles and Permissions
- Follow the Principle of Least Privilege: Grant users only the permissions they need to perform their tasks.
- Regularly Audit Permissions: Periodically review roles and permissions to ensure they are up to date.
- Backup Before Making Changes: Always create a backup before modifying user roles and permissions.
- Monitor User Activity: Use activity monitoring plugins to track user actions on your site.
Conclusion
Managing user roles and permissions in WordPress and Elementor helps ensure a secure and well-structured site. Use WordPress’s built-in tools for basic management and plugins like User Role Editor or Members for advanced control. In Elementor, configure access through the Role Manager for enhanced workflow management.
