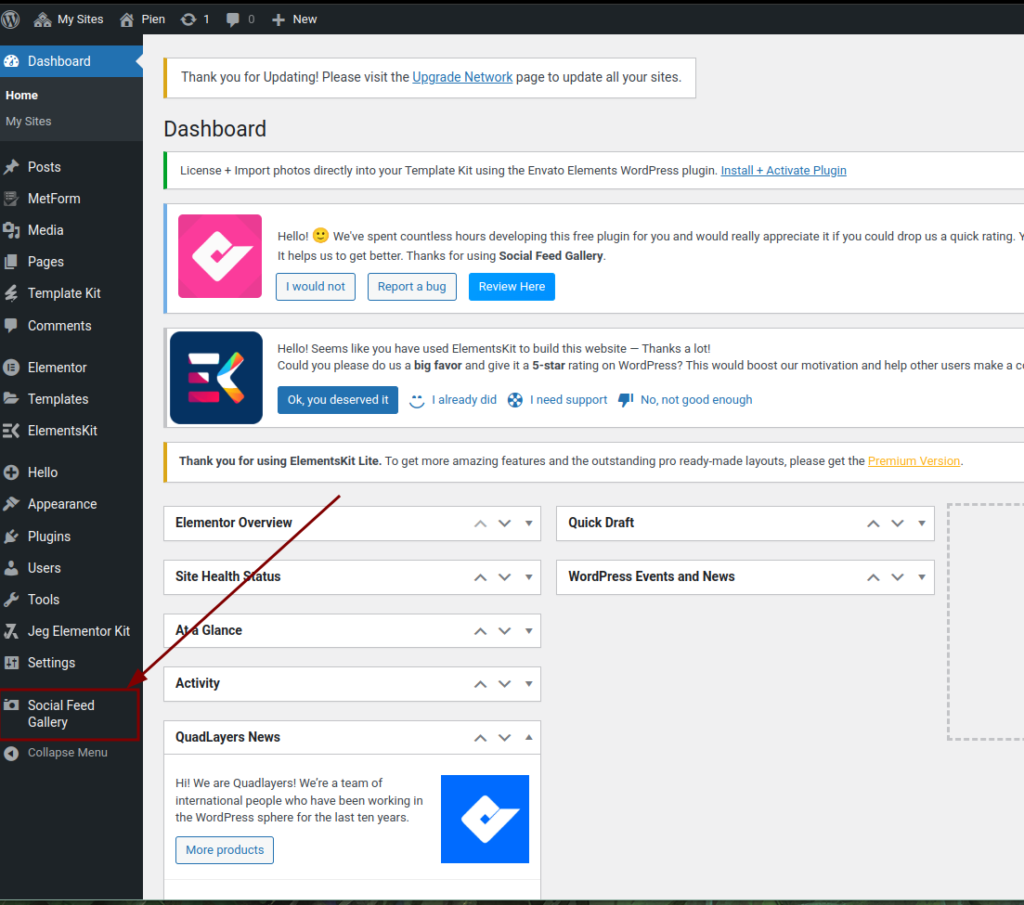
Step 1: Access the WordPress Dashboard
- Log in to your WordPress dashboard using your admin account.
- From the menu, select Social Feed Gallery.
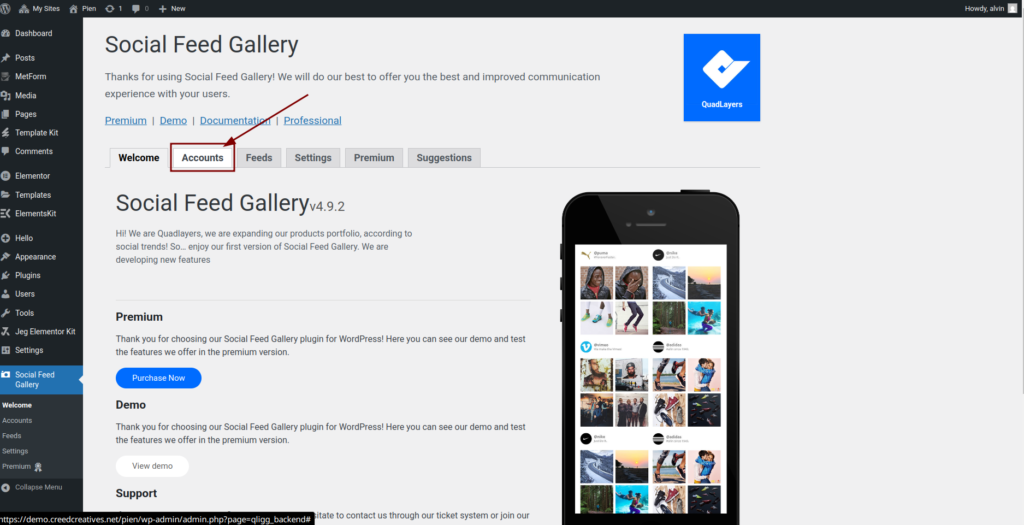
Step 2: Configure Social Feed Gallery
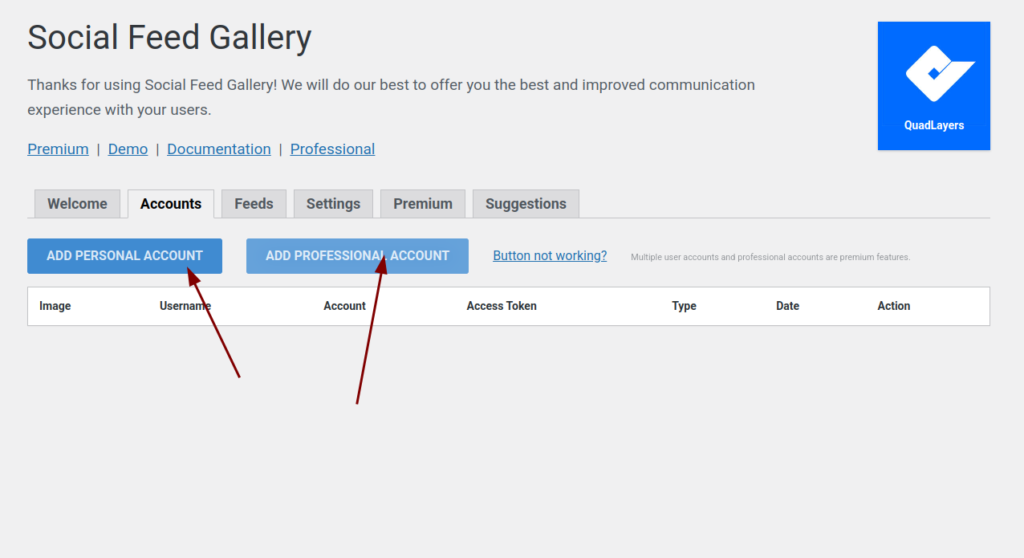
- Go to the Accounts tab.
- Add your Personal or Professional account, depending on what you use.
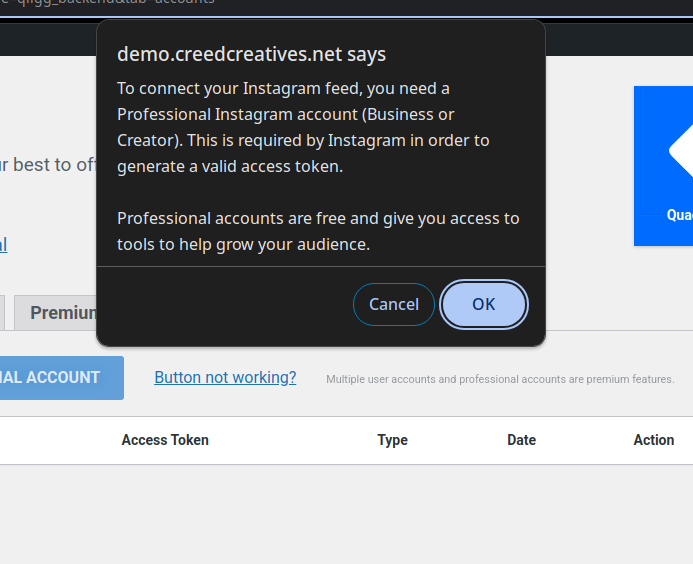
- Read the alert modal and click OK. You’ll be redirected to Instagram to grant permissions.
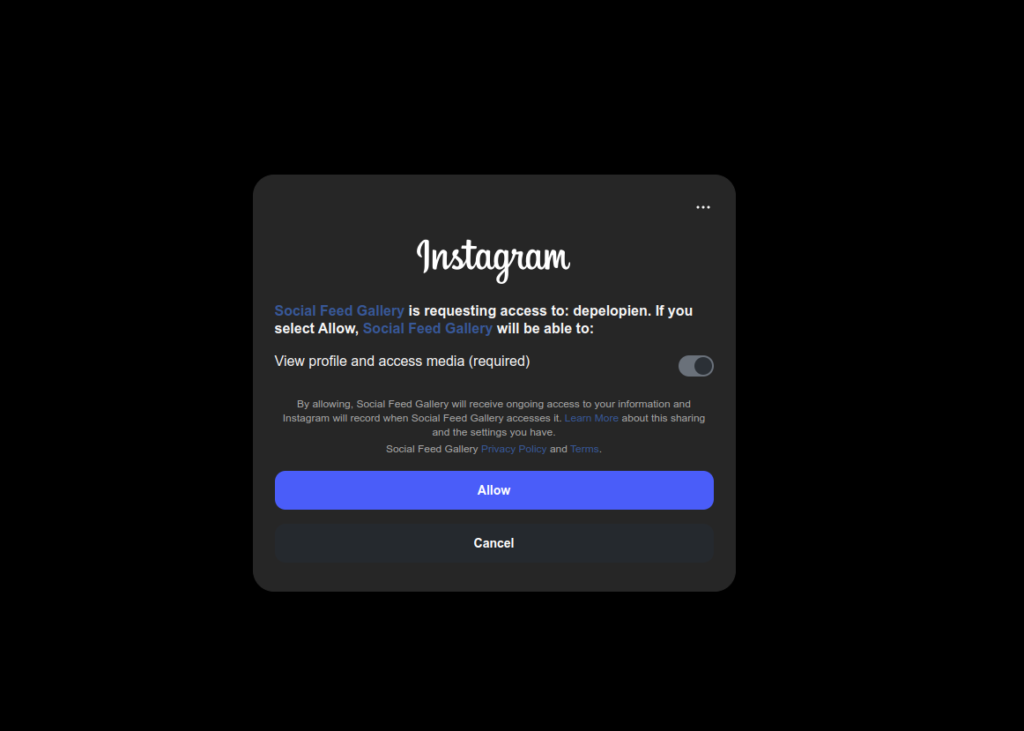
- Click Allow.
Step 2: Configure Feed
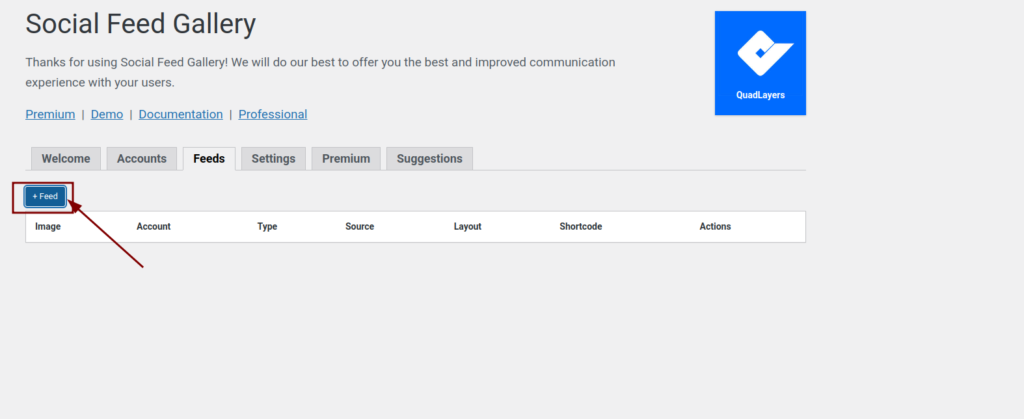
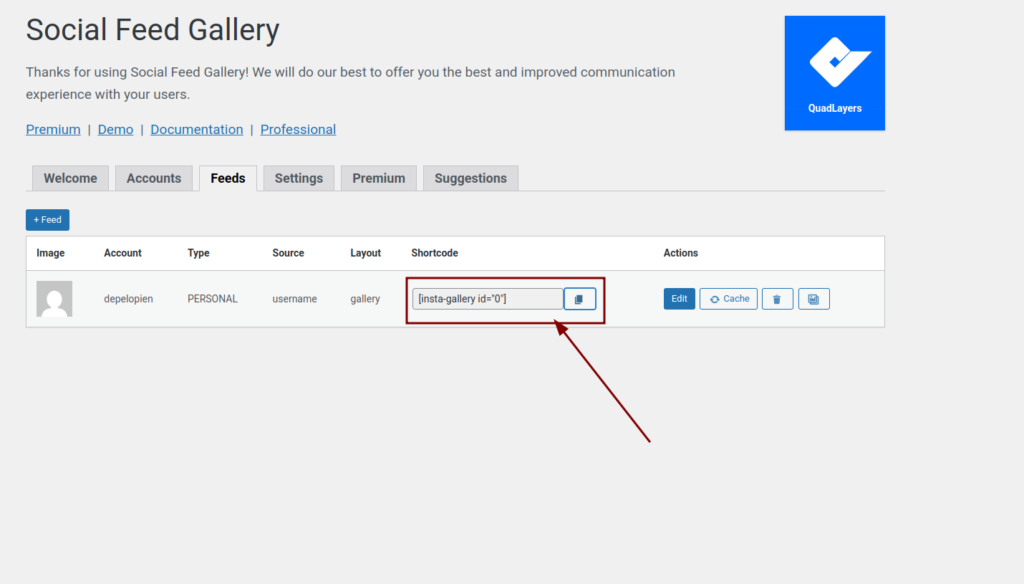
- Return to Social Feed Gallery and open the Feeds tab.

- Click + Feed.
- Configure the feed as you like:
General menu: Select the account, style, and post limit.
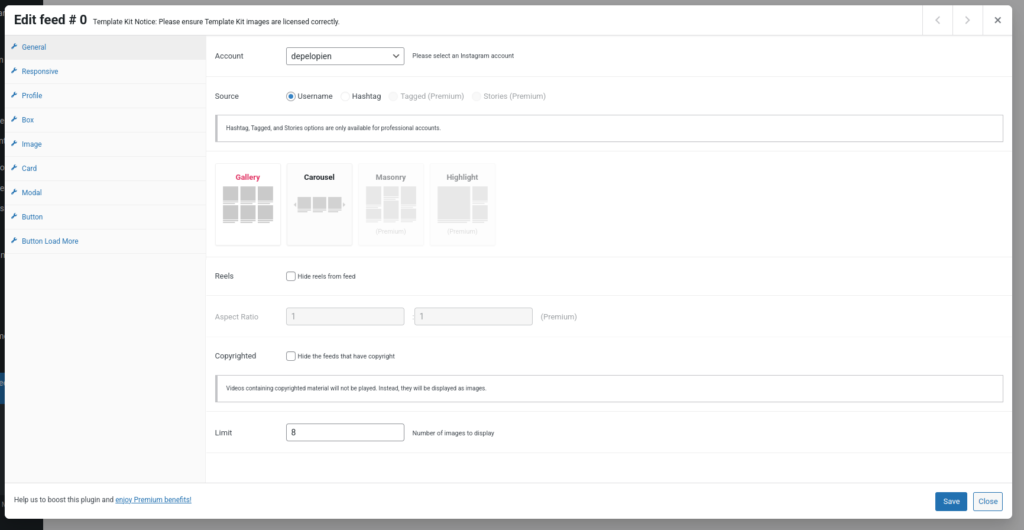
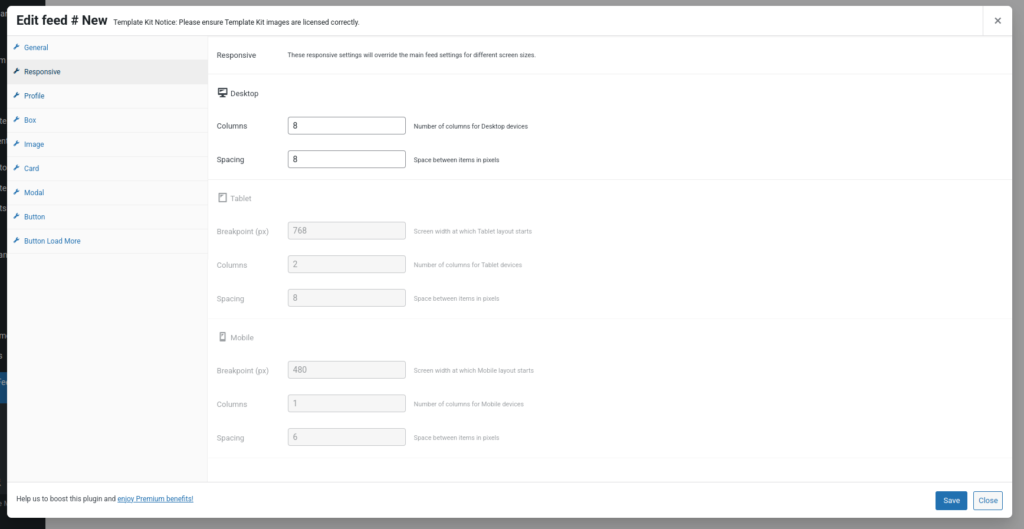
- Responsive menu: Set the number of columns and spacing.
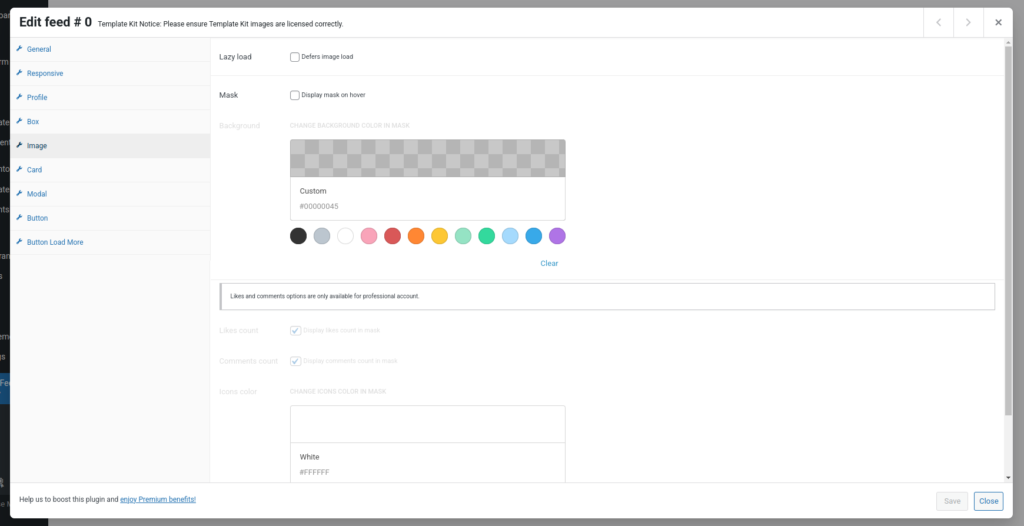
- Image menu: Disable the mask or choose a color.
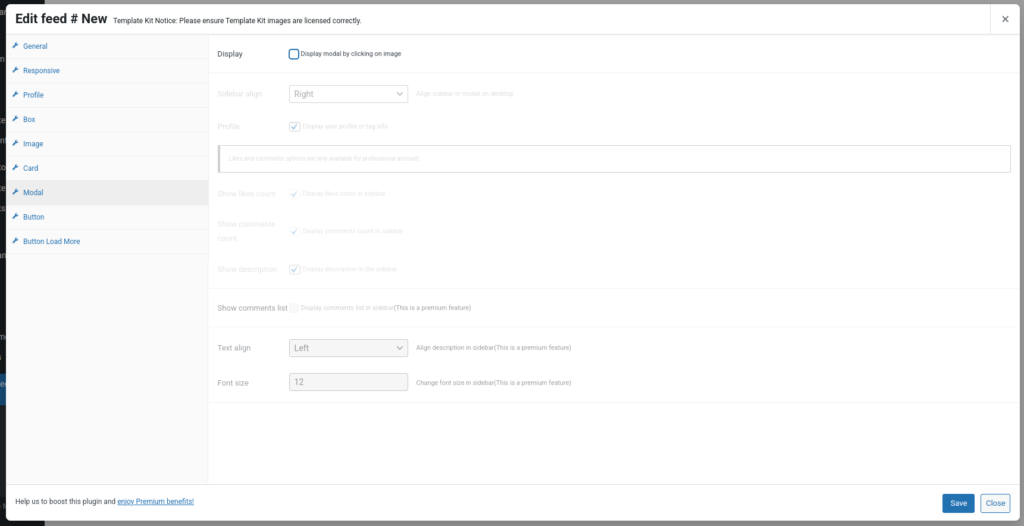
- Modal menu: Disable or customize the modal.
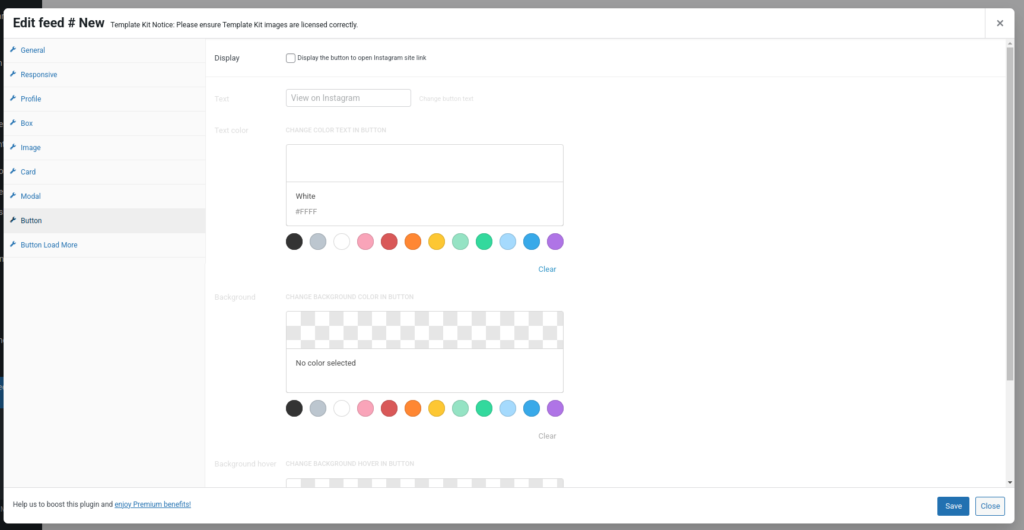
- Button menu: Disable or customize the button.
and Click Save.
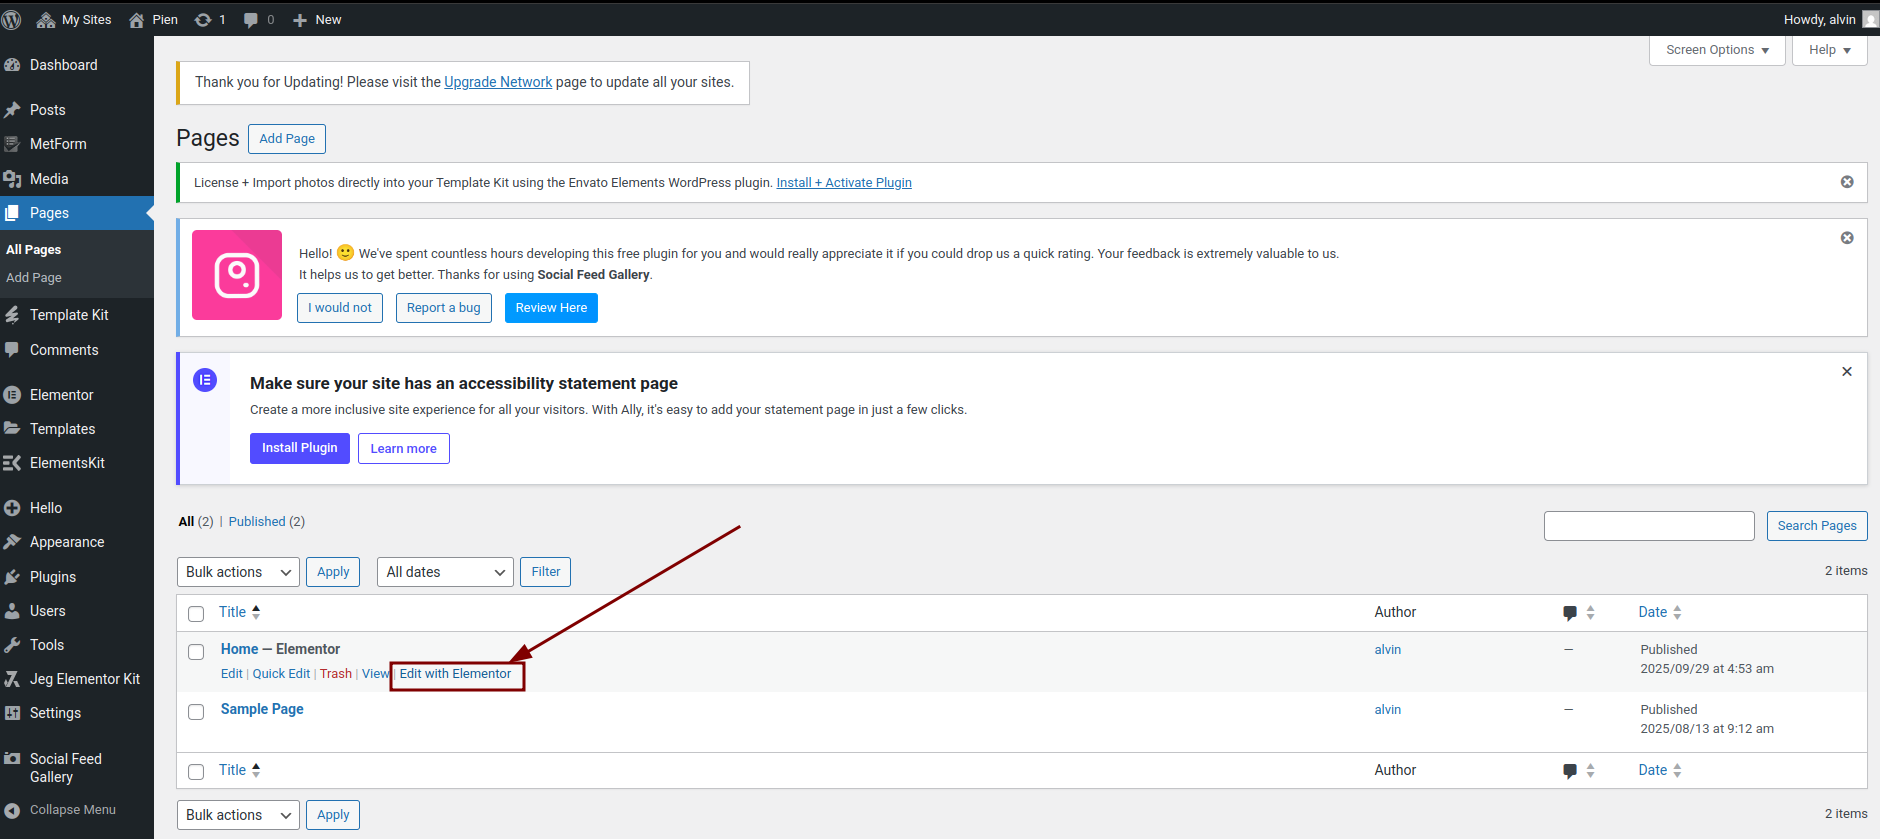
Step 3: Add Feed to a Page
- Copy the shortcode of your newly created feed.
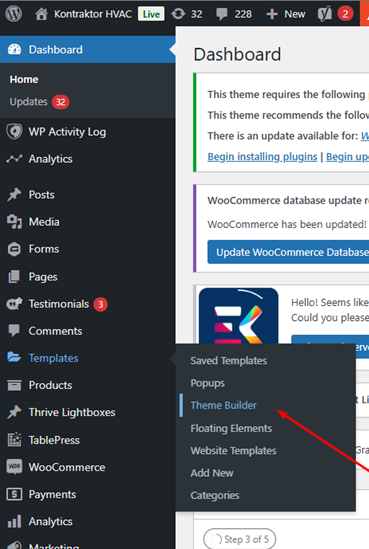
- Go to the Pages menu to edit a page, or navigate to Templates → Theme Builder to edit the header or footer.
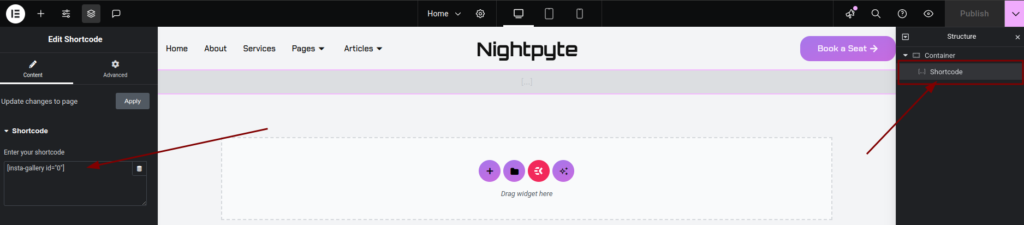
Click Edit with Elementor (or edit directly in Theme Builder).

- Add a shortcode element (or edit an existing one) and paste the shortcode from Social Feed Gallery.
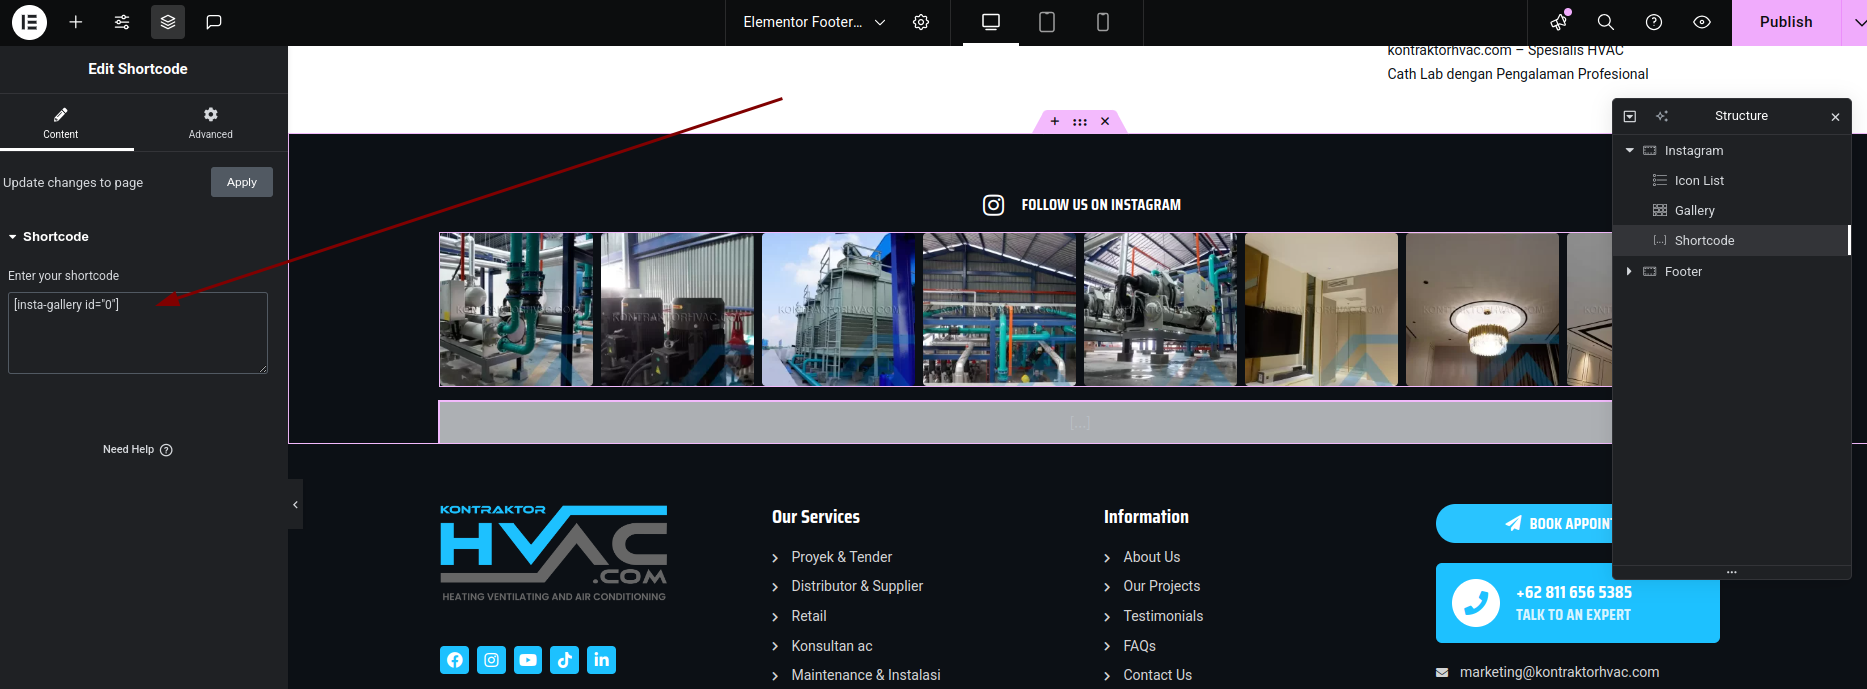
- When finished, click the Publish button at the top right corner.
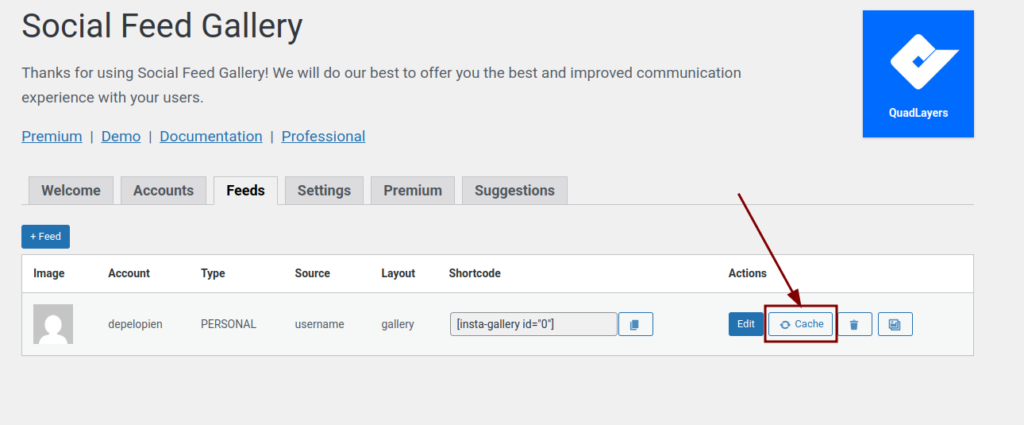
If your feed is not updated, click Cache button on the feed in Social Feed Gallery.