Part 1: Create a Table in TablePress
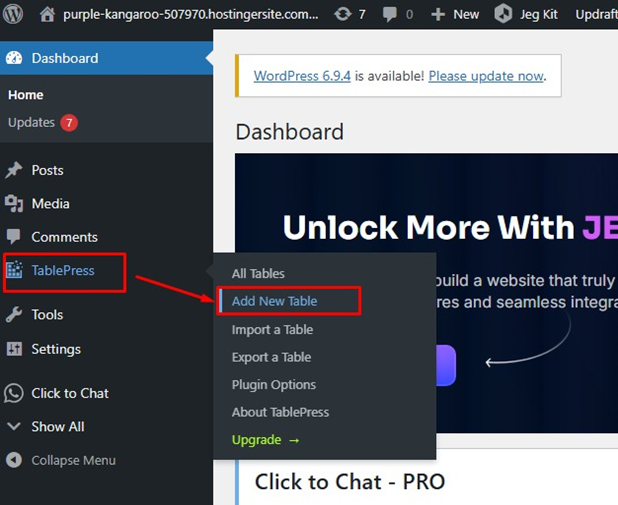
- Log in to your WordPress dashboard

- Click TablePress on the left sidebar
- Click Add New Table
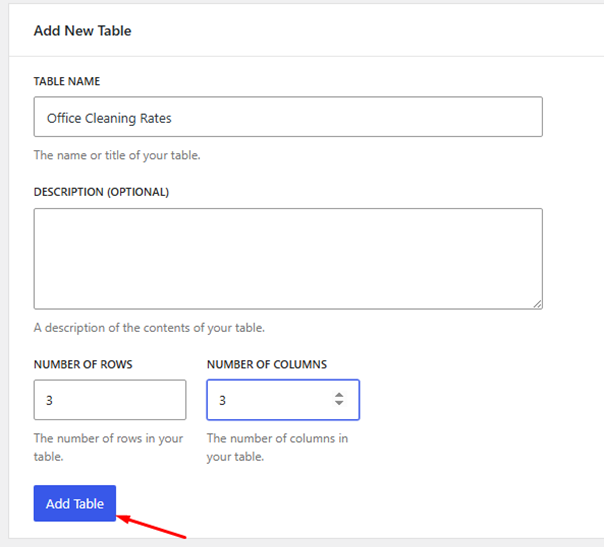
- Enter a Table Name (e.g., Office Cleaning Rates)
- Set number of rows and columns
- Click Add Table
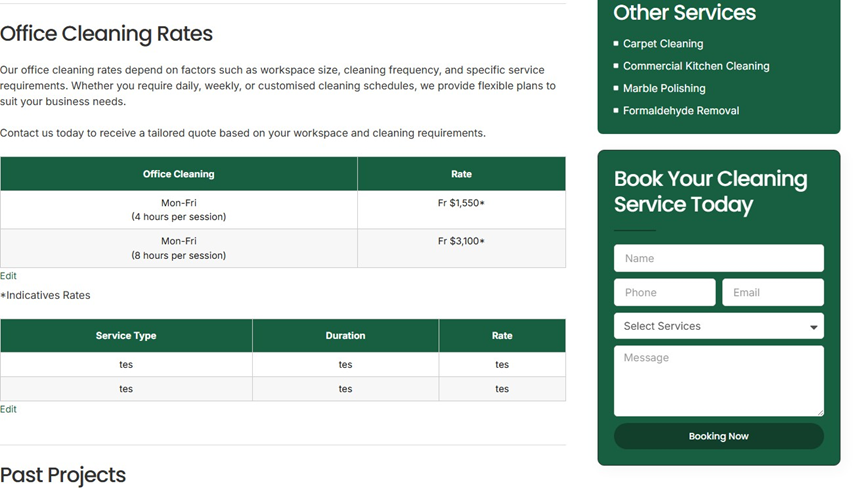
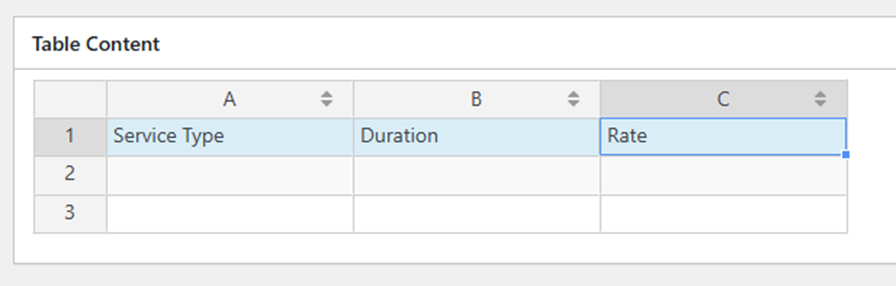
- Fill in the table content (Service Type, Duration, Rate)
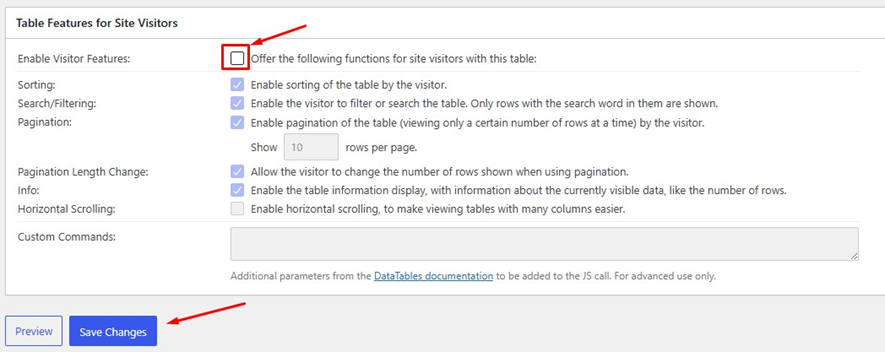
- Scroll to Table Features for site visitor and uncheck the enable visitor features
- Click Save Changes
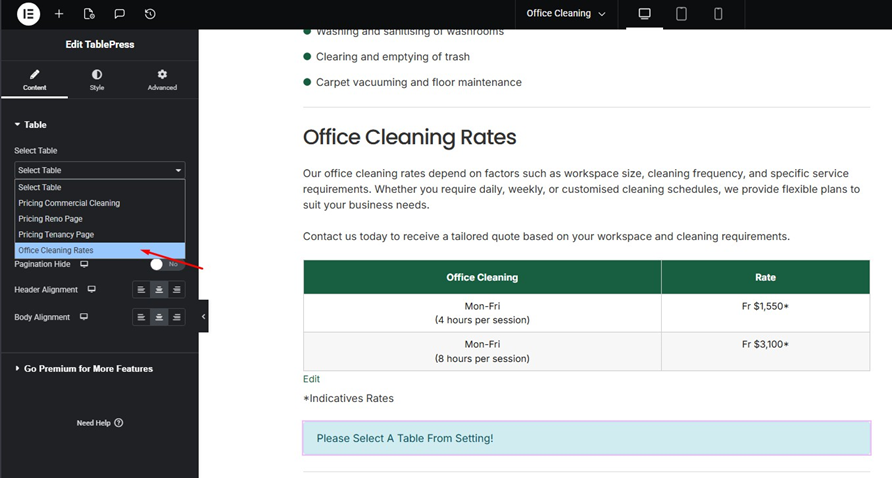
Part 2: Add Table to Elementor Page
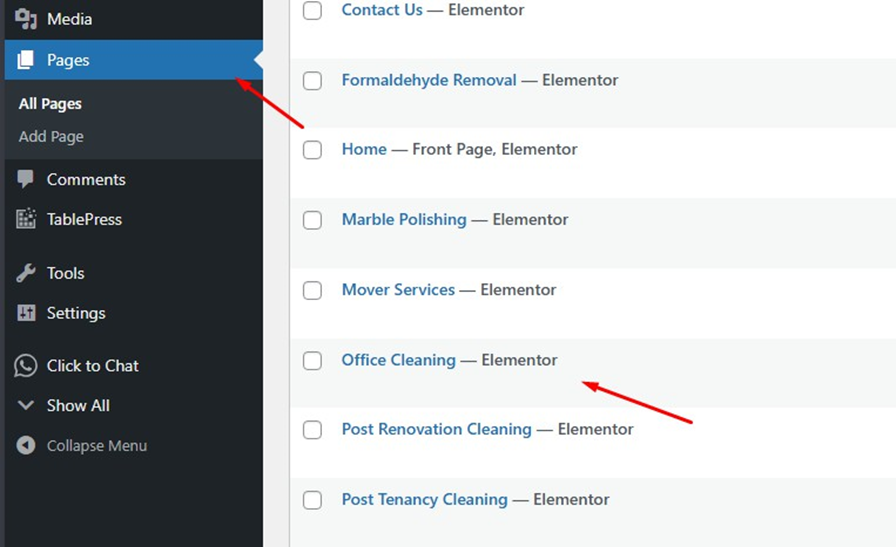
- Go to Pages and select your page
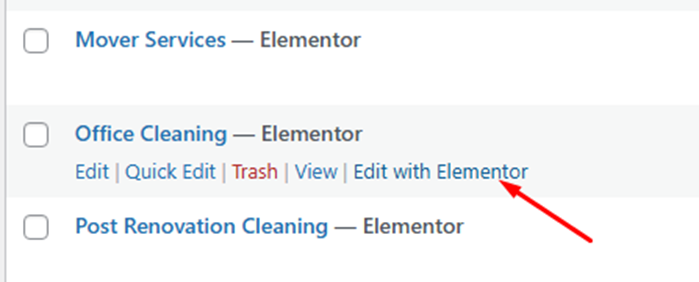
- Click Edit with Elementor
- Drag the table widget into the section
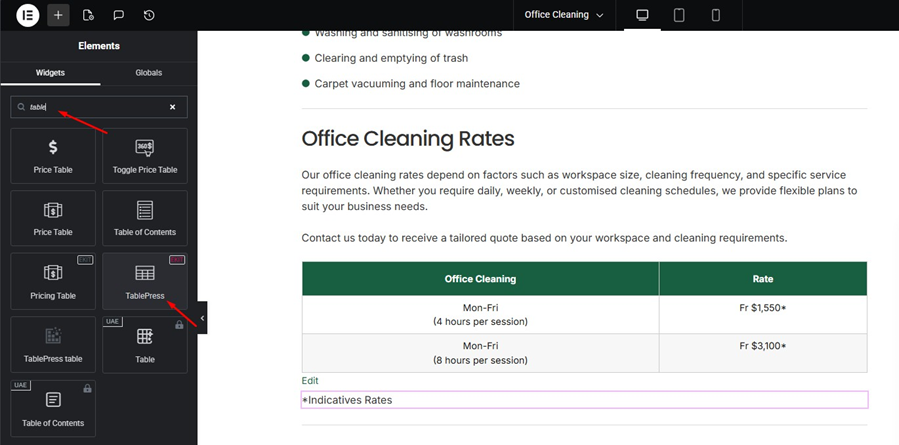
- Select the data table
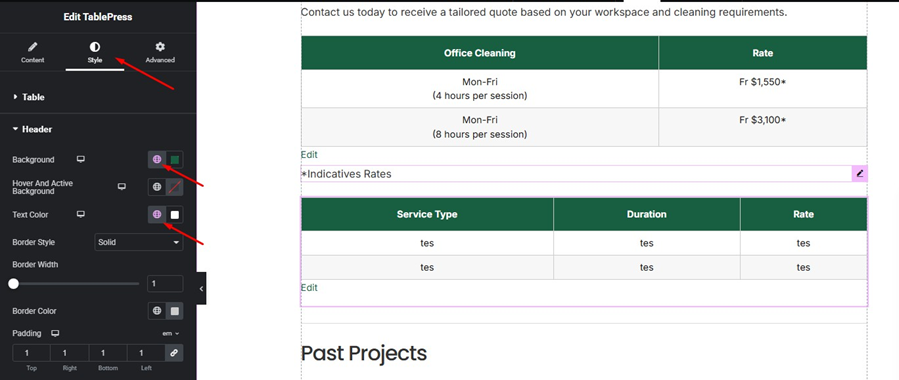
- Go to style > header and choose the color to background and text color
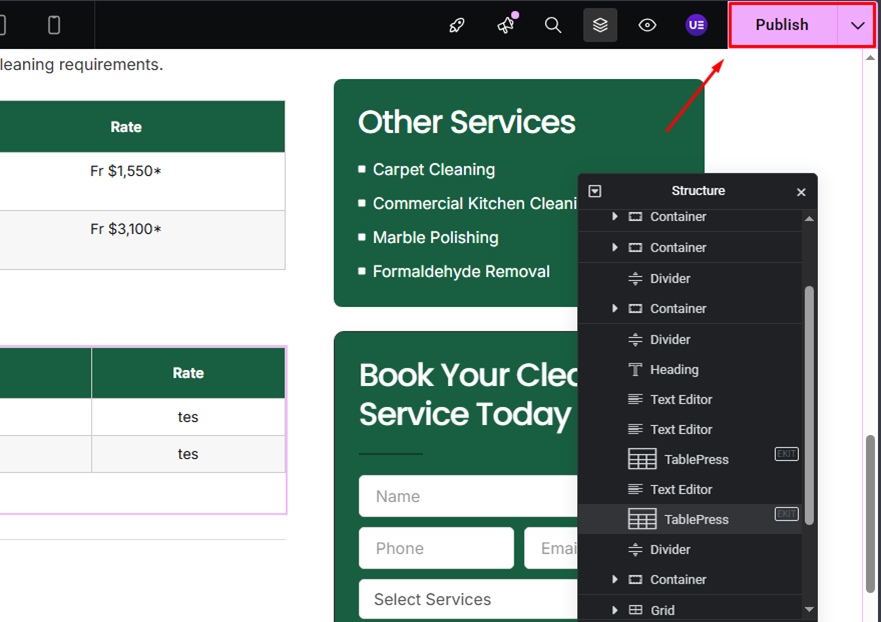
- Click Publish to save changes
Part 3: Check Table on Website
- Open the page on your website, refresh the page
- Ensure the table displays correctly without search or pagination