
The Spacer Widget in Elementor allows you to create custom spacing between elements, giving you better control over the layout. When working with the Elementor Template Kit Free and ElementsKit, you can use the Spacer Widget to adjust spacing efficiently. Here’s how:
Step 1: Add the Spacer Widget
- Open Elementor Editor:
- Edit the page or template where you want to add spacing.
- Open the Elementor editor.
- Edit the page or template where you want to add spacing.
- Add the Spacer Widget:
- In the Elementor widget panel, search for Spacer.
- Drag and drop the Spacer Widget into the desired location on your page, such as between sections, rows, or widgets.
- In the Elementor widget panel, search for Spacer.

Step 2: Adjust Spacer Settings
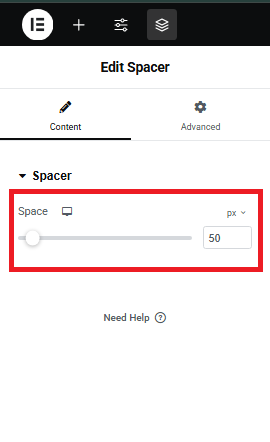
- Set the Height:
- Once the Spacer Widget is placed, its default height will appear in the editor.
- Adjust the Height slider in the left-hand panel to increase or decrease the spacing.
- You can enter a custom value for precise spacing.
- Once the Spacer Widget is placed, its default height will appear in the editor.
1. Use Responsive Controls:
- Click on the Responsive Mode icon at the bottom of the Elementor panel.
- Adjust the height for desktop, tablet, and mobile views to ensure the spacing looks good across all devices.

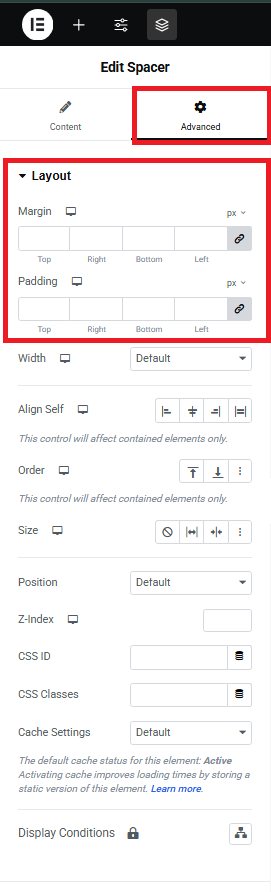
2. Combine with Padding and Margins:
- If needed, further control the spacing using the Advanced tab in any widget or section to add padding and margins around elements.
Step 3: Save Your Changes
- Preview Your Design:
- Check how the spacing looks on the live preview.
- Use the responsive preview options to see how it appears on different screen sizes.
- Check how the spacing looks on the live preview.
- Save or Update:
- Once satisfied with the spacing, click Update or Publish to save your changes.
